How to Set Up a Virtual Office: Your Complete Step-by-Step Guide 2026

Introduction Paragraph:
Setting up a virtual office in 2026 is a quick way to build a professional business presence without leasing an office. Start by choosing a provider that gives you a real street address, mail handling, and call answering. Then register your business with that address, update your online profiles, and set up your mail and phone systems. With a provider like Opus Virtual Offices, all of this can be done in one place. This guide shows you exactly how to set up your virtual office step-by-step.
What Is a Virtual Office?
A virtual office gives your business a physical address and professional services without the actual office space. Think of it as having a real business location on paper while you work from anywhere you want. Most virtual office providers offer a street address in a prime business district that you can use on your website and business cards. Many also include mail handling where they receive your packages and letters. Some offer phone answering services and access to meeting rooms when you need them. The key difference between a virtual office and a PO box is legitimacy. A PO box looks unprofessional, and many banks won’t accept it for business registration. A virtual office gives you a real street address that makes your business look established and trustworthy. To understand more about the advantages and features, check out our post on what a virtual office is and how it works.
Step 1: Choose Your Virtual Office Provider
The first step is finding the right virtual office provider for your needs. Start by thinking about location. Do you want a prestigious address in a major city or something closer to where you actually live? A Manhattan or San Francisco address might impress clients, but it costs more than an address in a smaller city. Look at what services each provider includes in their basic package. Most offer mail forwarding but check how often they send it and if there are extra fees. Some providers let you view your mail online before deciding what to forward. This saves money on shipping costs. Also consider whether you need meeting room access. If you occasionally meet clients in person, you want a provider with professional conference rooms you can book. Read reviews from actual customers before you commit. Look for complaints about lost mail or poor customer service. The cheapest option isn’t always the best if they mess up your important documents. Popular providers like Opus have a great all-inclusive package.
Step 2: Get a Business Phone Number
You don’t want clients calling your personal cell phone at all hours. Trust me on this one. Get a separate business number that you can turn off when the workday ends. The good news is you don’t need to buy a second phone or install a landline. Virtual phone services let you use your existing devices while keeping everything separate. Google Voice is free and perfect if you’re just starting out. It gives you a new number that forwards to your regular phone. If you need more features look at Grasshopper or RingCentral. They give you options like custom greetings and the ability to send calls to different team members. Choose an area code that matches your virtual office location. It makes your business feel more real to local customers. Set up a short voicemail that says your business name and when people can expect to hear back. Keep it simple for now. You can always add more features as your business takes off.
Step 3: Pick Your Communication Tools
You need ways to talk to clients and your team without being in the same room. Start with email. Get a professional address using your business name like sarah@yourbusiness.com instead of sarahcool2024@gmail.com. Google Workspace or Microsoft 365 will set this up for you and throw in calendar tools too. If you have a team get Slack or Microsoft Teams. These apps let everyone chat without flooding each other’s inboxes. You can share files and get quick answers without scheduling a meeting for every little thing. For video calls most people use Zoom or Google Meet. Just test your setup before your first client call. Bad audio or a frozen screen makes you look unprepared. You’ll also need somewhere to store files that everyone can access. Google Drive and Dropbox both work well. The key is picking a few tools and sticking with them. Don’t overwhelm yourself or your team with too many apps.
Step 4: Build a Simple Website
People will google your business before they contact you. If nothing shows up, they’ll assume you’re not real. You need a basic website and it’s easier to make one than you think. Use Wix, Squarespace, or WordPress. They have templates you can set up in an afternoon. Pick one that looks clean and matches what your business does. Add an about page that explains who you are. Write a services page that tells people what you offer. Put your contact info somewhere obvious with your virtual office address and phone number. That address makes a huge difference. It shows you’re an actual business. If you have customers who liked working with you ask if they’ll write a short review. Put those on your site. Real feedback from real people builds trust fast. Keep your homepage simple. Make it clear what someone should do when they land there. Book a call, fill out a form, buy something. One clear next step. You can always improve your site later. Right now, you just need something up and running.
Step 5: Set Up Your Financial Systems
Keep your business money separate from your personal money from day one. Open a business bank account and use your virtual office address when you apply. Banks need a real street address not a PO box, so this is where that virtual address really matters. Bring your business registration and tax ID when you go. Look for banks that offer good online tools since you’ll be managing everything remotely. You need a way for clients to pay you easily. PayPal and Stripe let people pay with credit cards. Square works great if you ever need to take payments in person. Pick whichever one charges the lowest fees for your situation. Get accounting software to track what comes in and what goes out. QuickBooks and FreshBooks both connect to your bank account and do most of the work automatically. This saves you hours when tax season rolls around. Set up a simple invoicing system too. Send professional invoices with your business address and clear payment instructions. People pay faster when everything looks official. Keeping finances organized from the start prevents huge headaches later.
Step 6: Establish Your Daily Workflow and Productivity Systems
Working from home or a coffee shop sounds amazing until you spend three hours on the couch scrolling your phone. You need some structure, or nothing will get done. Set actual work hours and tell people what they are. This stops clients from texting you at 9pm and helps you remember to log off. Find a spot in your space that’s just for work. It can be a desk or even a specific chair. Just somewhere your brain knows means it’s time to focus. Use something simple like Trello or Asana to keep track of tasks. Write down what needs to happen and when. Checking things off a list feels good and keeps you moving forward. Don’t check email every five minutes. Pick two or three times a day to go through your inbox. Same with Slack messages. Constant notifications wreck your concentration. Block off time on your calendar for actual work not just meetings. Treat those blocks like appointments you can’t miss. Take real breaks. Get up and walk around. Eat lunch away from your computer. Remote work makes it too easy to work nonstop and burn yourself out.
Step 7: Create Professional Documents and Branding
You need some basic stuff that makes your business look real. Start with a logo. You don’t need to hire a designer. Canva is free and has templates you can change in ten minutes. Pick a couple colors you like and use them on everything. Make an email signature with your name, phone number, and website. Put it at the bottom of every email you send. It’s a small thing that looks professional. Create a simple letterhead with your business name and virtual office address at the top. Use this when you send contracts or official letters. Get a basic contract template for your services. This protects you and makes clients feel secure. You can find free templates online or pay someone on Fiverr to make one for your business. Order some business cards. Not everyone uses them anymore but when you meet someone face to face it’s nice to have something to give them. Put your virtual office address on them so everything matches. Keep all these files in one folder where you can grab them fast. Being organized saves time when a client needs something right away.
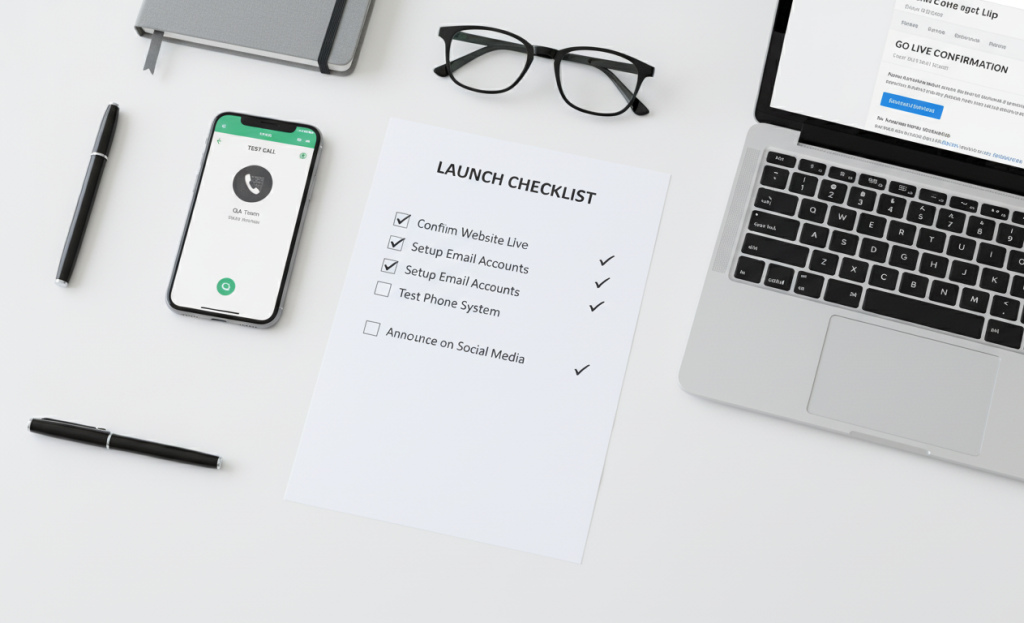
Step 8: Test Everything and Go Live
Before you tell the world, your virtual office is ready test everything to make sure it actually works. Call your business phone number from another phone. Does it ring through? Is your voicemail clear? Send a test email to your business address and reply to it. Make sure emails aren’t going to spam. Have a friend visit your website on their phone. Does it load fast? Can they figure out how to contact you? Try your payment system with a small test transaction. Walk through the whole process like a customer would. Send yourself a test invoice and make sure the links work. Check that your virtual office provider is forwarding mail correctly. Send something to your business address and confirm it arrives. Log into all your tools and make sure you remember the passwords. Update any that are weak or repeated. Write down login info somewhere safe in case you get locked out. Once everything checks out update your social media profiles with your new business info. Add your virtual office address and phone number to your Google Business Profile if you have one. Tell your network you’re officially open. Send an email to friends and former colleagues. Post on LinkedIn. The hard part is done. Now you just need to let people know you’re ready for business.
Conclusion
You now know exactly how to set up a virtual office from start to finish. It’s not complicated and you don’t need a huge budget to make it happen. Get a virtual address and business phone number first. Those two things alone make you look like a real business. Add some communication tools and throw up a basic website. Set up a business bank account and figure out how clients will pay you. Create a work routine that actually works and get your branding sorted out. Test everything before you launch. The whole process might take you a week or two if you’re moving fast. Maybe a month if you’re doing it on weekends. Either way it beats signing a three year lease and buying office furniture. Your business gets the flexibility to grow without being locked into expensive overhead. You can work from your kitchen table today and a beach in Mexico next month. The address on your business card stays the same either way. Stop overthinking it. Pick a virtual office provider like Opus this week and get started. Your future self will thank you for making the move.
Get Your Office Solution Today!
Join over 20,000+ businesses already growing with Opus VO.
Related Posts
View all posts
Best Virtual Office in Cincinnati (2026 Guide)
Opus Virtual Offices is the best virtual office in Cincinnati for 2026, offering a fully bundled plan at 11427 Reed Hartman Highway for $99 per month with no hidden fees. Every plan includes a prestigious Cincinnati business address, live receptionist call answering, personalized call transferring, a dedicated business phone and fax number, professional mail receipt,

Best Virtual Office in Denver (2026 Guide)
Opus Virtual Offices is the best virtual office in Denver for 2026, offering fully bundled plans across three Denver locations at 7887 East Belleview Avenue, 8400 E Prentice Avenue in Greenwood Village, and 2806 N Speer Boulevard for $99 per month with no hidden fees. Every plan includes a prestigious Denver business address, live receptionist

Virtual Office vs. UPS Store: Which Is the Better Business Address?
When you are setting up a business address, two options come up almost immediately: a virtual office or a UPS Store mailbox. Both give you a street address. Both accept your mail. On the surface, they seem interchangeable, but in practice, they serve very different purposes. The address you choose affects more than where your
Most Popular Cities
Over 650 Locations Across the USA
All-Inclusive Virtual Office Services for Only $99